مقدمه
با عرض سلام و وقت بخیر خدمت کاربران سایت پی وی لرن . و کاربرانی که دوره کامل آموزش برنامه نویسی اندروید را دنبال می کنند. گاهی اوقات شما نمی خواهید یک تصویر به طور ناگهانی بر روی صفحه نمایش ظاهر شود، بلکه شما می خواهید برخی از انیمیشن ها را بروی تصویر اعمال کنید که از یک تصویر به یک تصویر دیگر منتقل می شود. این توسط Android در قالب ImageSwitcher پشتیبانی می شود. در ادامه ی مباحث این آموزش شما را با چگونگی کار با Image Switcher در اندروید آشنا خواهیم داد.
Image Switcher در برنامه نویسی اندروید
در این مبحث به ساختار کار با Image Switcher در برنامه نویسی اندروید و متدهای مربوط به آن می پردازیم.
همچنین برای درک بهتر مطالب در ادامه به بررسی یک مثال در این زمینه می پردازیم.
یک Image Switcher اجازه می دهد تا برخی از تغییرات را بر روی تصاویر اضافه کنید.
برای استفاده از Image Switcher، ابتدا باید مولفه XML آن را تعریف کنید:
مثال :
| <ImageSwitcher android:id="@+id/imageSwitcher1" android:layout_width="wrap_content" android:layout_height="wrap_content" android:layout_centerHorizontal="true" android:layout_centerVertical="true" > </ImageSwitcher> |
حالا یک نمونه از ImageSwitcher را در فایل جاوا ایجاد کرده و یک مرجع به جزء مربوطه در XML ایجاد می کنیم:
مثال :
| private ImageSwitcher imageSwitcher; imageSwitcher = (ImageSwitcher)findViewById(R.id.imageSwitcher1); |
چیزی که بعدا باید انجام دهیم این است که رابط اینترفیس ViewFactory را اجرا کرده و متد unimplemented را اجرا کنیم.
ساختا کار به صورت زیر است:
مثال :
| imageSwitcher.setImageResource(R.drawable.ic_launcher); imageSwitcher.setFactory(new ViewFactory() { public View makeView() { ImageView myView = new ImageView(getApplicationContext()); return myView; } } |
آخرین چیزی که باید انجام دهید این است که انیمیشن را به ImageSwitcher اضافه کنید.
شما نیاز به تعریف یک شی از کلاس انیمیشن از طریق کلاس AnimationUtilities با فراخوانی یک متد static loadAnimation دارید.
ساختار کار به صورت زیر است:
مثال :
| Animation in = AnimationUtils.loadAnimation(this,android.R.anim.slide_in_left); imageSwitcher.setInAnimation(in); imageSwitcher.setOutAnimation(out); |
متد setInAnimaton انیمیشن ظاهر شی بر روی صفحه را تنظیم می کند در حالی که setOutAnimation در مقابل عمل می کند.
متد ()loadAnimation یک شیء متحرک ایجاد می کند.
به غیر از این متدها، متدهای دیگر تعریف شده در کلاس ImageSwitcher وجود دارد که به شرح زیر است:
| ردیف | متد و توضیحات |
|---|
| ۱ | setImageDrawable(Drawable drawable) یک تصویر را با image switcher تنظیم می کند. |
| ۲ | setImageResource(int resid) یک تصویر را با image switcher تنظیم کرده و تصویر را با شناسه id ارسال می کند. |
| ۳ | setImageURI(Uri uri) یک تصویر را با image switcher تنظیم کرده و تصویر را با آدرس آن ارسال می کند. |
| ۴ | ImageSwitcher(Context context, AttributeSet attrs) یک شی image switcher را با تنظیمات قبلی و برخی از ویژگی های منتقل شده در متد برمی گرداند. |
| ۵ | onInitializeAccessibilityEvent (AccessibilityEvent event) AccessibilityEvent را با اطلاعاتی درباره این View که منبع رویداد است، آغاز می کند. |
| ۶ | onInitializeAccessibilityNodeInfo (AccessibilityNodeInfo info) اطلاعات AccessibilityNodeInfo را با اطلاعات مربوط به این View تجزیه می کند. |
مثال
مثال زیر برخی از افکت های image switcher در bitmap را نشان می دهد.
نکته : برای اجرا و تست این برنامه شما به یک دستگاه واقعی اندروید نیاز دارید.
مراجل انجام کار :
| مراحل | توضیحات |
|---|
| ۱ | مراحل ایجاد برنامه در اندروید استدیو را طبق بخش های قبلی دنبال کرده و نام پکیج را com.pvlearn.myapplication قرار بدهید. |
| ۲ | به محتوای فایل src/MainActivity.java کدهای مورد نیاز را اضافه کنید. |
| ۳ | به محتوای فایل res/layout/activity_main کدهای طراحی را اضافه کنید. |
| ۴ | برنامه را اجرا کنید تا شبیه ساز اندروید نتیجه را نمایش دهد. |
محتوای فایل src/MainActivity.java به صورت زیر خواهد بود :
مثال :
1 2 3 4 5 6 7 8 9 10 11 12 13 14 15 16 17 18 19 20 21 22 23 24 25 26 27 28 29 30 31 32 33 34 35 36 37 38 39 40 41 42 43 44 45 46 47 48 49 50 51 52 53 54 55 56 57 | package com.example.Pvlearn.myapplication; import android.app.Activity; import android.app.ActionBar.LayoutParams; import android.os.Bundle; import android.view.View; import android.widget.Button; import android.widget.ImageSwitcher; import android.widget.ImageView; import android.widget.Toast; import android.widget.ViewSwitcher.ViewFactory; public class MainActivity extends Activity { private ImageSwitcher sw; private Button b1,b2; @Override protected void onCreate(Bundle savedInstanceState) { super.onCreate(savedInstanceState); setContentView(R.layout.activity_main); b1 = (Button) findViewById(R.id.button); b2 = (Button) findViewById(R.id.button2); sw = (ImageSwitcher) findViewById(R.id.imageSwitcher); sw.setFactory(new ViewFactory() { @Override public View makeView() { ImageView myView = new ImageView(getApplicationContext()); myView.setScaleType(ImageView.ScaleType.FIT_CENTER); myView.setLayoutParams(new ImageSwitcher.LayoutParams(LayoutParams.WRAP_CONTENT, LayoutParams.WRAP_CONTENT)); return myView; } }); b1.setOnClickListener(new View.OnClickListener() { @Override public void onClick(View v) { Toast.makeText(getApplicationContext(), "previous Image", Toast.LENGTH_LONG).show(); sw.setImageResource(R.drawable.abc); } }); b2.setOnClickListener(new View.OnClickListener() { @Override public void onClick(View v) { Toast.makeText(getApplicationContext(), "Next Image", Toast.LENGTH_LONG).show(); sw.setImageResource(R.drawable.tp); } }); } } |
محتوای فایل res/layout/activity_main.xml :
مثال :
1 2 3 4 5 6 7 8 9 10 11 12 13 14 15 16 17 18 19 20 21 22 23 24 25 26 27 28 29 30 31 32 33 34 35 36 37 38 39 40 41 42 43 44 45 46 47 48 49 50 51 52 53 54 55 56 | <?xml version="1.0" encoding="utf-8"?> <RelativeLayout xmlns:android="http://schemas.android.com/apk/res/android" xmlns:tools="http://schemas.android.com/tools" android:layout_width="match_parent" android:layout_height="match_parent" android:paddingLeft="@dimen/activity_horizontal_margin" android:paddingRight="@dimen/activity_horizontal_margin" android:paddingTop="@dimen/activity_vertical_margin" android:paddingBottom="@dimen/activity_vertical_margin" tools:context=".MainActivity"> <TextView android:text="Gestures Example" android:layout_width="wrap_content" android:layout_height="wrap_content" android:id="@+id/textview" android:textSize="35dp" android:layout_alignParentTop="true" android:layout_centerHorizontal="true" /> <TextView android:layout_width="wrap_content" android:layout_height="wrap_content" android:text="Pvlearn" android:id="@+id/textView" android:layout_below="@+id/textview" android:layout_centerHorizontal="true" android:textColor="#ff7aff24" android:textSize="35dp" /> <ImageSwitcher android:layout_width="wrap_content" android:layout_height="wrap_content" android:id="@+id/imageSwitcher" android:layout_below="@+id/textView" android:layout_centerHorizontal="true" android:layout_marginTop="168dp" /> <Button android:layout_width="wrap_content" android:layout_height="wrap_content" android:text="@string/left" android:id="@+id/button" android:layout_below="@+id/textView" android:layout_centerHorizontal="true" /> <Button android:layout_width="wrap_content" android:layout_height="wrap_content" android:text="@string/right" android:id="@+id/button2" android:layout_alignParentBottom="true" android:layout_alignLeft="@+id/button" android:layout_alignStart="@+id/button" /> </RelativeLayout> |
محتوای فایل Strings.xml:
مثال :
| <resources> <string name="app_name">My Application</string> <string name="left"><![CDATA[<]]></string> <string name="right"><![CDATA[>]]></string> </resources> |
محتوای فایل AndroidManifest.xml:
مثال :
1 2 3 4 5 6 7 8 9 10 11 12 13 14 15 16 17 18 19 20 21 22 23 | <?xml version="1.0" encoding="utf-8"?> <manifest xmlns:android="http://schemas.android.com/apk/res/android" package="com.example.Pvlearn.myapplication" <application android:allowBackup="true" android:icon="@drawable/ic_launcher" android:label="@string/app_name" android:theme="@style/AppTheme" > <activity android:name="com.example.Pvlearn.myapplication.MainActivity" android:label="@string/app_name" > <intent-filter> <action android:name="android.intent.action.MAIN" /> <category android:name="android.intent.category.LAUNCHER" /> </intent-filter> </activity> </application> </manifest> |
اجرای برنامه
برای اجرای برنامه ی اندرویدی خود یکی از فایل های activity در برنامه ی خود کلیک کنید.
سپس روی نماد  (Run) از نوار ابزار برای شروع اجرای برنامه کلیک کنید.
سپس نتیجه اجرای برنامه را در دستگاه اندروید خود مشابه زیر مشاهده خواهید کرد:
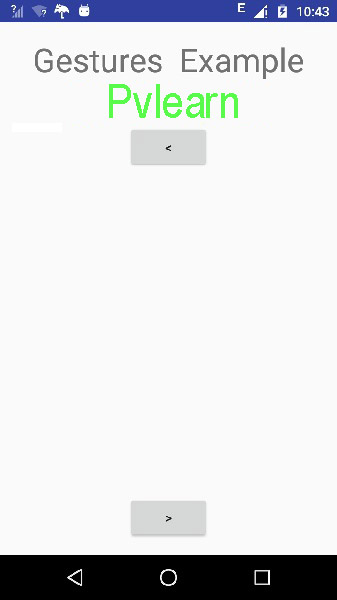
Image Switcher در برنامه نویسی اندروید
حالا می توانید دو Button را در صفحه نمایش موبایل مشاهده کنید.
حالا روی button بالا که فلش راست روی آن قرار دارد کلیک کنید تا یک تصویر از سمت راست ظاهر شود:
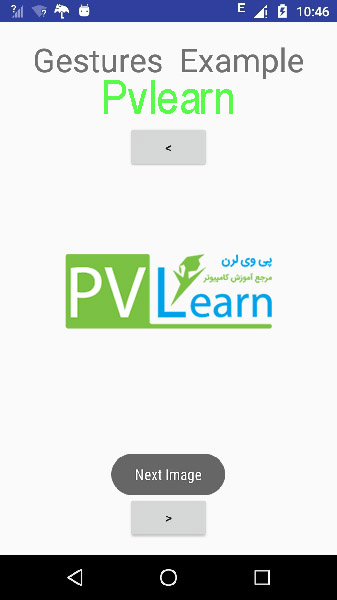
Image Switcher در برنامه نویسی اندروید -تست برنامه
حالا روی button پایین صفحه کلیک کنید، سپس با یک حرکت انیمیشن به تصویر قبلی برمی گردید:
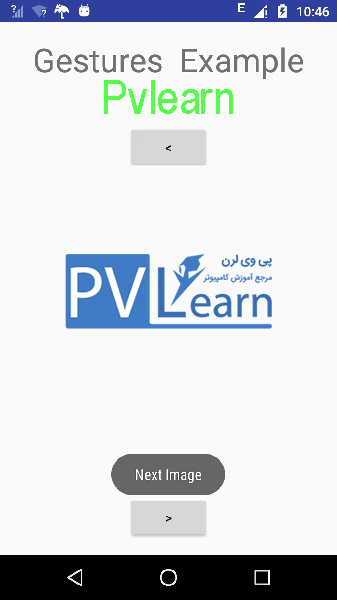
Image Switcher در برنامه نویسی اندروید -تست برگشت
کلام آخر
اگر اپلیکیشنی ایجاد کرده اید که نیاز دارید که قابلیت سوئیچ بین تصاویر اپلیکیشن را با یک افکت انیمیشن به برنامه اضافه کنید، Image Switcher گزینه مناسبی برای این هدف می باشد، از این رو ما مباحث این آموزش را به آموزش Image Switcher در برنامه نویسی اندروید اختصاص دادیم.
مباحث بخش بعد را به کار با حافظه داخلی در برنامه نویسی اندروید اختصاص داده ایم.