<?xml version="1.0" encoding="utf-8"?>
<RelativeLayout xmlns:android="http://schemas.android.com/apk/res/android"
xmlns:tools="http://schemas.android.com/tools" android:layout_width="match_parent"
android:layout_height="match_parent" android:paddingLeft="@dimen/activity_horizontal_margin"
android:paddingRight="@dimen/activity_horizontal_margin"
android:paddingTop="@dimen/activity_vertical_margin"
android:paddingBottom="@dimen/activity_vertical_margin" tools:context=".MainActivity">
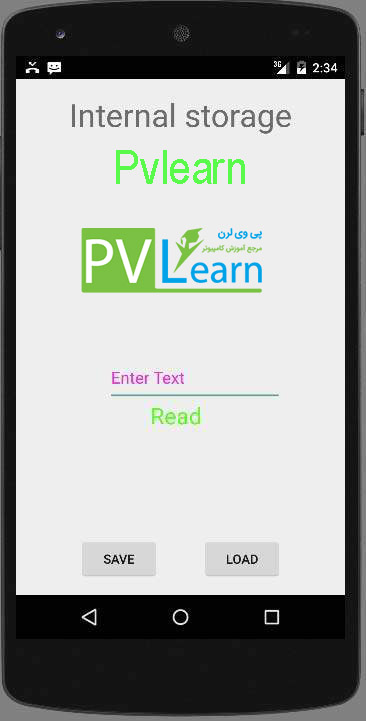
<TextView android:text="Internal storage" android:layout_width="wrap_content"
android:layout_height="wrap_content"
android:id="@+id/textview"
android:textSize="35dp"
android:layout_alignParentTop="true"
android:layout_centerHorizontal="true" />
<TextView
android:layout_width="wrap_content"
android:layout_height="wrap_content"
android:text="Tutorials point"
android:id="@+id/textView"
android:layout_below="@+id/textview"
android:layout_centerHorizontal="true"
android:textColor="#ff7aff24"
android:textSize="35dp" />
<Button
android:layout_width="wrap_content"
android:layout_height="wrap_content"
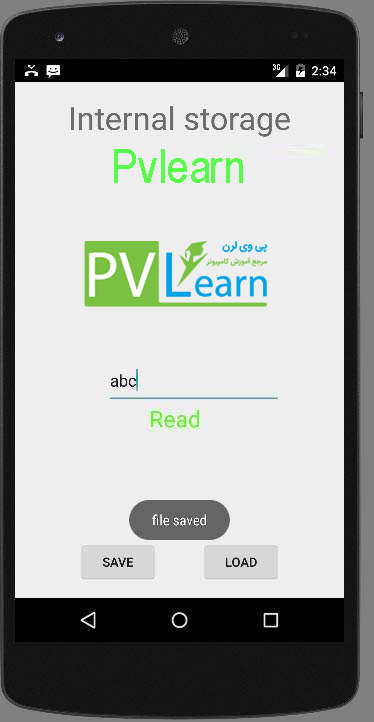
android:text="Save"
android:id="@+id/button"
android:layout_alignParentBottom="true"
android:layout_alignLeft="@+id/textView"
android:layout_alignStart="@+id/textView" />
<EditText
android:layout_width="wrap_content"
android:layout_height="wrap_content"
android:id="@+id/editText"
android:hint="Enter Text"
android:focusable="true"
android:textColorHighlight="#ff7eff15"
android:textColorHint="#ffff25e6"
android:layout_below="@+id/imageView"
android:layout_alignRight="@+id/textView"
android:layout_alignEnd="@+id/textView"
android:layout_marginTop="42dp"
android:layout_alignLeft="@+id/imageView"
android:layout_alignStart="@+id/imageView" />
<ImageView
android:layout_width="wrap_content"
android:layout_height="wrap_content"
android:id="@+id/imageView"
android:src="@drawable/abc"
android:layout_below="@+id/textView"
android:layout_centerHorizontal="true" />
<Button
android:layout_width="wrap_content"
android:layout_height="wrap_content"
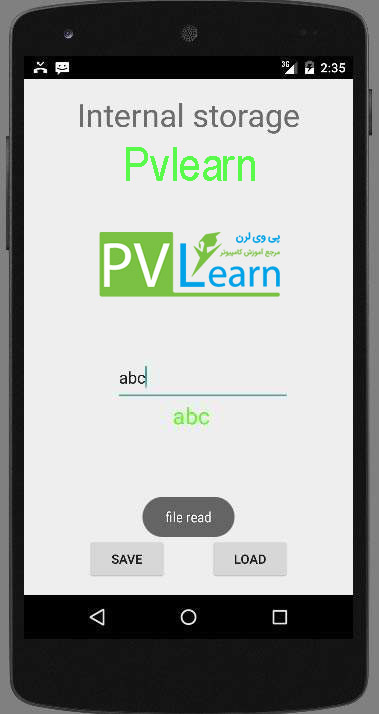
android:text="load"
android:id="@+id/button2"
android:layout_alignTop="@+id/button"
android:layout_alignRight="@+id/editText"
android:layout_alignEnd="@+id/editText" />
<TextView
android:layout_width="wrap_content"
android:layout_height="wrap_content"
android:text="Read"
android:id="@+id/textView2"
android:layout_below="@+id/editText"
android:layout_toLeftOf="@+id/button2"
android:layout_toStartOf="@+id/button2"
android:textColor="#ff5bff1f"
android:textSize="25dp" />
</RelativeLayout>