با عرض سلام و وقت بخیر خدمت کاربران سایت پی وی لرن . و کاربرانی که دوره کامل آموزش برنامه نویسی اندروید را دنبال می کنند. آندروید به شما اجازه می دهد با اضافه کردن انواع مختلف افکت ها روی تصاویر، آن ها را دستکاری کنید. شما می توانید به راحتی تکنیک های پردازش تصویر را اعمال کنید تا انواع مختلفی از افکت ها را بر روی تصاویر اضافه کنید. افکت ها می تواند شامل ایجاد روشنایی، تاریکی، تبدیل سیاه و سفید و… باشند، اندروید کلاس Bitmap را برای پردازش تصاویر فراهم می کند.که این کلاس را می توان در android.graphics.bitmap پیدا کرد، ما در ادامه ی مباحث این آموزش شما را با چگونگی کار با افکت های تصویر در اندروید آشنا خواهیم کرد.
در ادامه ی مباحث طرز کار با افکت های تصویر در برنامه نویسی اندروید و متدهای مربوطه را ارائه می دهیم.
همچنین در ادامه ی آموزش به بررسی مثالی از ایجاد افکت های مختلف روی تصویر می پردازیم.
ابتدا باید با استفاده از کلاس Bitmap یک imageView بصورت زیر ایجاد کنید:
1 2 3 4 | private Bitmap bmp; private ImageView img; img = (ImageView)findViewById(R.id.imageView1); BitmapDrawable abmp = (BitmapDrawable)img.getDrawable(); |
سپس باید یک bitmap را با فراخوانی متد ()getBitmap از کلاس BitmapDrawable بصورت زیر ایجاد کنیم:
1 | bmp = abmp.getBitmap(); |
یک image چیزی جز یک ماتریس دو بعدی نیست. همانطور که شما یک Bitmap را تنظیم می کنید، یک تصویر نیز از پیکسل ها تشکیل شده است.
ساختار آن به صورت زیر است:
1 2 3 4 5 | for(int i=0; i<bmp.getWidth(); i++){ for(int j=0; j<bmp.getHeight(); j++){ int p = bmp.getPixel(i, j); } } |
در کد فوق توابع ()getWidth و ()getHeight عرض و ارتفاع ماتریس را برمی گرداند.
متد ()getPixel پیکسل ها را از index مشخص شده برمی گرداند.
هنگامی که پیکسل را گرفتید، می توانید به راحتی با توجه به نیازهای خود آن را دستکاری کنید.
علاوه بر متدهای فوق ، متدهای دیگری نیز ارائه شده که اجازه ی انواع دستکاری ها را روی تصاویر می دهد:
ردیف | متد و توضیحات |
---|---|
۱ | copy(Bitmap.Config config, boolean isMutable) این متد پیکسل های یک bitmap را در bitmap جدید کپی می کند. |
۲ | createBitmap(DisplayMetrics display, int width, int height, Bitmap.Config config) یک bitmap قابل تغییر را با عرضو ارتفاع مشخص شده برمی گرداند. |
۳ | createBitmap(int width, int height, Bitmap.Config config) یک bitmap قابل تغییر را با عرضو ارتفاع مشخص شده برمی گرداند. |
۴ | createBitmap(Bitmap src) یک bitmap غیر قابل تغییر را از bitmap منبع برمی گرداند. |
۵ | extractAlpha() یک bitmap جدید را که حاوی مقدار آلفا از اصلی آن است را برمی گرداند. |
۶ | getConfig() این متد پیکربندی را برمی گرداند، در غیر این صورت null است. |
۷ | getDensity() چگالی یک bitmap را برمی گرداند. |
۸ | getRowBytes() تعداد بایت های بین سطرهای پیکسلهای bitmap را برمی گرداند. |
۹ | setPixel(int x, int y, int color) رنگ های مشخص شده را داخل bitmap بر اساس مختصات x و y می نویسد. |
۱۰ | setDensity(int density) چگالی یک bitmap را برمی گرداند. |
مثال زیر برخی از افکت های تصویری روی یک bitmap را به شما نشان می دهد.
برای اجرا یا تست این برنامه شما نیاز به یک دستگاه اندروید واقعی دارید.
مراحل انجام کار:
مراحل | توضیحات |
---|---|
۱ | مراحل ایجاد برنامه در اندروید استدیو را طبق بخش های قبلی دنبال کرده و نام پکیج را com.pvlearn.myapplication قرار بدهید. |
۲ | به محتوای فایل src/MainActivity.java کدهای ضروری را اضافه کنید. |
۳ | اجزای طراحی را در محتوای فایل res/layout/activity_main تعریف کنید. |
۴ | برنامه را اجرا کنید تا شبیه ساز اندروید نتیجه را نمایش دهد. |
محتوای فایل MainActivity.java را به صورت زیر تغییر دهید:
1 2 3 4 5 6 7 8 9 10 11 12 13 14 15 16 17 18 19 20 21 22 23 24 25 26 27 28 29 30 31 32 33 34 35 36 37 38 39 40 41 42 43 44 45 46 47 48 49 50 51 52 53 54 55 56 57 58 59 60 61 62 63 64 65 66 67 68 69 70 71 72 73 74 75 76 77 78 79 80 81 82 83 84 85 86 87 88 89 90 91 92 93 94 95 96 97 98 99 100 101 102 103 104 105 106 107 108 109 110 111 112 113 114 115 116 117 118 119 120 121 122 123 124 125 126 127 128 129 130 131 132 133 134 135 136 137 138 139 140 141 142 143 144 145 146 147 148 149 150 151 152 153 154 155 156 157 158 159 160 | package com.example.Pvlearn.myapplication; import android.graphics.Bitmap; import android.graphics.Color; import android.graphics.drawable.BitmapDrawable; import android.support.v7.app.ActionBarActivity; import android.os.Bundle; import android.view.View; import android.widget.Button; import android.widget.ImageView; public class MainActivity extends ActionBarActivity { Button b1, b2, b3; ImageView im; private Bitmap bmp; private Bitmap operation; @Override protected void onCreate(Bundle savedInstanceState) { super.onCreate(savedInstanceState); setContentView(R.layout.activity_main); b1 = (Button) findViewById(R.id.button); b2 = (Button) findViewById(R.id.button2); b3 = (Button) findViewById(R.id.button3); im = (ImageView) findViewById(R.id.imageView); BitmapDrawable abmp = (BitmapDrawable) im.getDrawable(); bmp = abmp.getBitmap(); } public void gray(View view) { operation = Bitmap.createBitmap(bmp.getWidth(),bmp.getHeight(), bmp.getConfig()); double red = 0.33; double green = 0.59; double blue = 0.11; for (int i = 0; i < bmp.getWidth(); i++) { for (int j = 0; j < bmp.getHeight(); j++) { int p = bmp.getPixel(i, j); int r = Color.red(p); int g = Color.green(p); int b = Color.blue(p); r = (int) red * r; g = (int) green * g; b = (int) blue * b; operation.setPixel(i, j, Color.argb(Color.alpha(p), r, g, b)); } } im.setImageBitmap(operation); } public void bright(View view){ operation= Bitmap.createBitmap(bmp.getWidth(), bmp.getHeight(),bmp.getConfig()); for(int i=0; i<bmp.getWidth(); i++){ for(int j=0; j<bmp.getHeight(); j++){ int p = bmp.getPixel(i, j); int r = Color.red(p); int g = Color.green(p); int b = Color.blue(p); int alpha = Color.alpha(p); r = 100 + r; g = 100 + g; b = 100 + b; alpha = 100 + alpha; operation.setPixel(i, j, Color.argb(alpha, r, g, b)); } } im.setImageBitmap(operation); } 
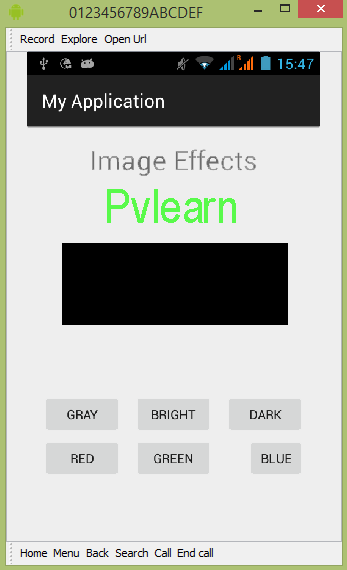
public void dark(View view){ operation= Bitmap.createBitmap(bmp.getWidth(),bmp.getHeight(),bmp.getConfig()); for(int i=0; i<bmp.getWidth(); i++){ for(int j=0; j<bmp.getHeight(); j++){ int p = bmp.getPixel(i, j); int r = Color.red(p); int g = Color.green(p); int b = Color.blue(p); int alpha = Color.alpha(p); r = r - 50; g = g - 50; b = b - 50; alpha = alpha -50; operation.setPixel(i, j, Color.argb(Color.alpha(p), r, g, b)); } } im.setImageBitmap(operation); } public void gama(View view) { operation = Bitmap.createBitmap(bmp.getWidth(),bmp.getHeight(),bmp.getConfig()); for(int i=0; i<bmp.getWidth(); i++){ for(int j=0; j<bmp.getHeight(); j++){ int p = bmp.getPixel(i, j); int r = Color.red(p); int g = Color.green(p); int b = Color.blue(p); int alpha = Color.alpha(p); r = r + 150; g = 0; b = 0; alpha = 0; operation.setPixel(i, j, Color.argb(Color.alpha(p), r, g, b)); } } im.setImageBitmap(operation); } 
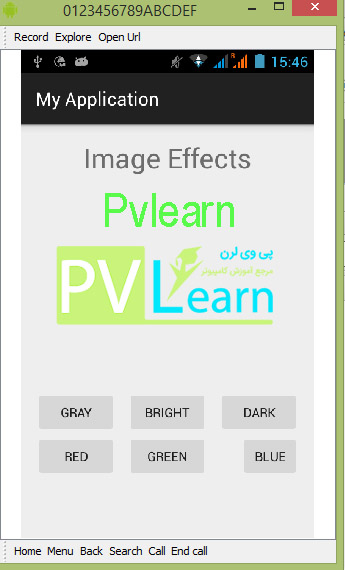
public void green(View view){ operation = Bitmap.createBitmap(bmp.getWidth(),bmp.getHeight(), bmp.getConfig()); for(int i=0; <bmp.getWidth(); i++){ for(int j=0; j<bmp.getHeight(); j++){ int p = bmp.getPixel(i, j); int r = Color.red(p); int g = Color.green(p); int b = Color.blue(p); int alpha = Color.alpha(p); r = 0; g = g+150; b = 0; alpha = 0; operation.setPixel(i, j, Color.argb(Color.alpha(p), r, g, b)); } } im.setImageBitmap(operation); } public void blue(View view){ operation = Bitmap.createBitmap(bmp.getWidth(),bmp.getHeight(), bmp.getConfig()); for(int i=0; i<bmp.getWidth(); i++){ for(int j=0; j<bmp.getHeight(); j++){ int p = bmp.getPixel(i, j); int r = Color.red(p); int g = Color.green(p); int b = Color.blue(p); int alpha = Color.alpha(p); r = 0; g = 0; b = b+150; alpha = 0; operation.setPixel(i, j, Color.argb(Color.alpha(p), r, g, b)); } } im.setImageBitmap(operation); } } |
محتوای فایل res/layout/activity_main.xml:
1 2 3 4 5 6 7 8 9 10 11 12 13 14 15 16 17 18 19 20 21 22 23 24 25 26 27 28 29 30 31 32 33 34 35 36 37 38 39 40 41 42 43 44 45 46 47 48 49 50 51 52 53 54 55 56 57 58 59 60 61 62 63 64 65 66 67 68 69 70 71 72 73 74 75 76 77 78 79 80 81 82 83 84 85 86 87 88 89 90 91 92 93 94 95 96 97 98 | <?xml version="1.0" encoding="utf-8"?> <RelativeLayout xmlns:android="http://schemas.android.com/apk/res/android" xmlns:tools="http://schemas.android.com/tools" android:layout_width="match_parent" android:layout_height="match_parent" android:paddingLeft="@dimen/activity_horizontal_margin" android:paddingRight="@dimen/activity_horizontal_margin" android:paddingTop="@dimen/activity_vertical_margin" android:paddingBottom="@dimen/activity_vertical_margin" tools:context=".MainActivity"> <TextView android:layout_width="wrap_content" android:layout_height="wrap_content" android:id="@+id/textView" android:layout_alignParentTop="true" android:layout_centerHorizontal="true" android:textSize="30dp" android:text="Image Effects" /> <TextView android:layout_width="wrap_content" android:layout_height="wrap_content" android:text="Pvlearn" android:id="@+id/textView2" android:layout_below="@+id/textView" android:layout_centerHorizontal="true" android:textSize="35dp" android:textColor="#ff16ff01" /> <ImageView android:layout_width="wrap_content" android:layout_height="wrap_content" android:id="@+id/imageView" android:layout_below="@+id/textView2" android:layout_centerHorizontal="true" android:src="@drawable/abc"/> <Button android:layout_width="wrap_content" android:layout_height="wrap_content" android:text="Gray" android:onClick="gray" android:id="@+id/button" android:layout_alignParentBottom="true" android:layout_alignParentLeft="true" android:layout_alignParentStart="true" android:layout_marginBottom="97dp" /> <Button android:layout_width="wrap_content" android:layout_height="wrap_content" android:text="dark" android:onClick="dark" android:id="@+id/button2" android:layout_alignBottom="@+id/button" android:layout_alignParentRight="true" android:layout_alignParentEnd="true" /> <Button android:layout_width="wrap_content" android:layout_height="wrap_content" android:text="Bright" android:onClick="bright" android:id="@+id/button3" android:layout_alignTop="@+id/button2" android:layout_centerHorizontal="true" /> <Button android:layout_width="wrap_content" android:layout_height="wrap_content" android:text="Red" android:onClick="gama" android:id="@+id/button4" android:layout_below="@+id/button3" android:layout_alignParentLeft="true" android:layout_alignParentStart="true" /> <Button android:layout_width="wrap_content" android:layout_height="wrap_content" android:text="Green" android:onClick="green" android:id="@+id/button5" android:layout_alignTop="@+id/button4" android:layout_alignLeft="@+id/button3" android:layout_alignStart="@+id/button3" /> <Button android:layout_width="wrap_content" android:layout_height="wrap_content" android:text="blue" android:onClick="blue" android:id="@+id/button6" android:layout_below="@+id/button2" android:layout_toRightOf="@+id/textView" android:layout_toEndOf="@+id/textView" /> </RelativeLayout> |
محتوای فایل AndroidManifest.xml:
1 2 3 4 5 6 7 8 9 10 11 12 13 14 15 16 17 18 19 20 21 22 | <?xml version="1.0" encoding="utf-8"?> <manifest xmlns:android="http://schemas.android.com/apk/res/android" package="com.example.Pvlearn.myapplication" > <application android:allowBackup="true" android:icon="@mipmap/ic_launcher" android:label="@string/app_name" android:theme="@style/AppTheme" > <activity android:name=".MainActivity" android:label="@string/app_name" > <intent-filter> <action android:name="android.intent.action.MAIN" /> <category android:name="android.intent.category.LAUNCHER" /> </intent-filter> </activity> </application> </manifest> |
برای اجرای برنامه ی اندرویدی خود یکی از فایل های activity در برنامه ی خود کلیک کنید.
سپس روی نماد (Run) از نوار ابزار برای شروع اجرای برنامه کلیک کنید.
سپس نتیجه اجرای برنامه را در دستگاه اندروید خود مشابه زیر مشاهده خواهید کرد:
حالا اگر به صفحه ی خود در دستگاه موبایل نگاه کنید یک تصویر به همراه چند button را مشاهده خواهید کرد.
حالا روی Gray کلیک کنید تا تصویر شما سایه و سفید شود.
حالا روی دکمه ی bright کلیک کنید، که سبب روشنایی زمینه ی تصویر می شود:
حالا روی دکمه ی dark کلیک کنید تا زمینه ی تصویر مشابه عکس زیر تیره شود:
در نهایت روی دکمه ی red کلیک کنید تا همانند عکس زیر، زمینه تصویر را به رنگ قرمز تیره در آورد:
حالا روی دکمه ی green کلیک کنید تا زمینه ی تصویر مطابق عکس زیر به رنگ سبز روشن درآید:
در نهایت روی دکمه ی blue کلیک کنید تا رنگ زمینه ی تصویر به رنگ آبی درآید :
گاهی در بعضی اپلیکیشن های ایجاد شده با اندروید استدیو لازم می شود که شما امکان اعمال افکت های متنوع و خاصی را روی تصاویر خود به کاربران بدهید، از این رو مباحث این بخش را به آشنایی با افکت های تصویر در برنامه نویسی اندروید اختصاص دادیم.
در بخش بعدی به آموزش کار با Image Switcher در اندروید خواهیم پرداخت.