دوستان و علاقمندان به مباحث WPF وقتتون بخیر. با آموزش WPF از وب سایت آموزشی پی وی لرن همراهتون هستیم. با بررسی Interaction یا تعاملی در WPF ، این بخش از آموزش wpf را دنبال خواهیم نمود.
در WPF ، تعامل یا Interaction نشان می دهد که چگونه یک نمای با کنترل های مستقر در آن نما تعامل می کند. متداول ترین Interaction شناخته شده از دو نوع است.
Behavior ها با Expression Blend 3 معرفی شده است که می تواند برخی از کارکردها را در یک کامپوننت قابل استفاده مجدد قرار دهد. برای افزودن behavior های اضافی ، می توانید این مؤلفه ها را به کنترل ها وصل کنید. behavior ها برای طراحی تعاملات پیچیده کاربر به راحتی، انعطاف پذیری بیش تری ایجاد می کنند.
بیایید به یک مثال ساده نگاهی بیاندازیم که در آن یک رفتار ControlStoryBoardAction به کنترل ها اَتَچ می شود.
یک پروژه WPF جدید با نام WPFBehavior ایجاد کنید.
کد XAML زیر یک بیضی و دو دکمه برای کنترل حرکت بیضی ایجاد می کند.
1 2 3 4 5 6 7 8 9 10 11 12 13 14 15 16 17 18 19 20 21 22 23 24 25 26 27 28 29 30 31 32 33 34 35 36 37 38 39 40 41 42 43 44 45 46 47 48 49 50 51 52 53 54 55 56 57 58 59 60 61 62 63 64 65 66 67 68 69 70 71 72 73 74 75 76 77 78 79 80 81 82 | <Window xmlns = "http://schemas.microsoft.com/winfx/2006/xaml/presentation" xmlns:x = "http://schemas.microsoft.com/winfx/2006/xaml" xmlns:d = "http://schemas.microsoft.com/expression/blend/2008" xmlns:mc = "http://schemas.openxmlformats.org/markup-compatibility/2006" xmlns:local = "clr-namespace:WPFBehaviors" xmlns:i = "http://schemas.microsoft.com/expression/2010/interactivity" xmlns:ei = "http://schemas.microsoft.com/expression/2010/interactions" x:Class = "WPFBehaviors.MainWindow" mc:Ignorable = "d" Title = "MainWindow" Height = "350" Width = "604"> <Window.Resources> 
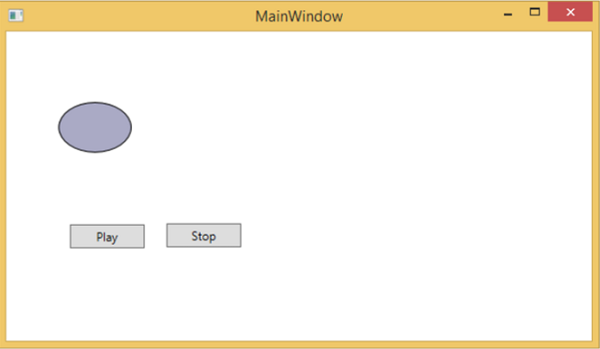
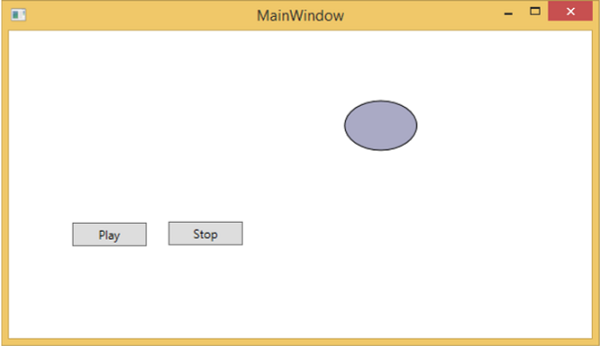
<Storyboard x:Key = "Storyboard1" RepeatBehavior = "Forever" AutoReverse = "True"> <DoubleAnimationUsingKeyFrames Storyboard.TargetProperty = "(UIElement.RenderTransform).(TransformGroup.Children )[3].(TranslateTransform.X)" Storyboard.TargetName = "ellipse"> <EasingDoubleKeyFrame KeyTime = "0:0:1" Value = "301.524"/> <EasingDoubleKeyFrame KeyTime = "0:0:2" Value = "2.909"/> </DoubleAnimationUsingKeyFrames> <DoubleAnimationUsingKeyFrames Storyboard.TargetProperty = "(UIElement.RenderTransform).(TransformGroup.Children )[3].(TranslateTransform.Y)" Storyboard.TargetName = "ellipse"> <EasingDoubleKeyFrame KeyTime = "0:0:1" Value = "-0.485"/> <EasingDoubleKeyFrame KeyTime = "0:0:2" Value = "0"/> </DoubleAnimationUsingKeyFrames> <ObjectAnimationUsingKeyFrames Storyboard.TargetProperty = "(ContentControl.Content)" Storyboard.TargetName = "button"> <DiscreteObjectKeyFrame KeyTime = "0" Value = "Play"/> </ObjectAnimationUsingKeyFrames> <ObjectAnimationUsingKeyFrames Storyboard.TargetProperty = "(ContentControl.Content)" Storyboard.TargetName = "button1"> <DiscreteObjectKeyFrame KeyTime = "0" Value = "Stop"/> <DiscreteObjectKeyFrame KeyTime = "0:0:2" Value = "Stop"/> </ObjectAnimationUsingKeyFrames> </Storyboard> </Window.Resources> <Window.Triggers> <EventTrigger RoutedEvent = "FrameworkElement.Loaded"> <BeginStoryboard Storyboard = "{StaticResource Storyboard1}"/> </EventTrigger> </Window.Triggers> <Grid> <Ellipse x:Name = "ellipse" Fill = "#FFAAAAC5" HorizontalAlignment = "Left" Height = "50.901" Margin = "49.324,70.922,0,0" Stroke = "Black" VerticalAlignment = "Top" Width = "73.684" RenderTransformOrigin = "0.5,0.5"> <Ellipse.RenderTransform> <TransformGroup> <ScaleTransform/> <SkewTransform/> <RotateTransform/> <TranslateTransform/> </TransformGroup> </Ellipse.RenderTransform> </Ellipse> <Button x:Name = "button" Content = "Play" HorizontalAlignment = "Left" Height = "24.238" Margin = "63.867,0,0,92.953" VerticalAlignment = "Bottom" Width = "74.654"> <i:Interaction.Triggers> <i:EventTrigger EventName = "Click"> <ei:ControlStoryboardAction Storyboard = "{StaticResource Storyboard1}"/> </i:EventTrigger> </i:Interaction.Triggers> </Button> <Button x:Name = "button1" Content = "Stop" HorizontalAlignment = "Left" Height = "24.239" Margin = "160.82,0,0,93.922" VerticalAlignment = "Bottom" Width = "75.138"> <i:Interaction.Triggers> <i:EventTrigger EventName = "Click"> <ei:ControlStoryboardAction ControlStoryboardOption = "Stop" Storyboard = "{StaticResource Storyboard1}"/> </i:EventTrigger> </i:Interaction.Triggers> </Button> </Grid> </Window> |
وقتی کد بالا را کامپایل و اجرا می کنید ، پنجره زیر را تولید می کند که حاوی بیضی و دو دکمه است.
با فشار دادن دکمه play ، حرکت از چپ به راست شروع می شود و سپس به موقعیت اصلی خود باز می گردد. دکمه stop حرکت بیضی را متوقف می کند.
کشیدن و رها کردن رابط کاربری می تواند به طور قابل توجهی کارایی و بهره وری برنامه را پیش ببرد. برنامه های کاربردی بسیار کمی وجود دارد که از ویژگی های کشیدن و رها کردن استفاده می شود زیرا مردم فکر می کنند پیاده سازی آن دشوار است. تا حدودی کار با ویژگی کشیدن و رها کردن دشوار است ، اما در WPF می توانید آن را به راحتی کنترل کنید.
بیایید یک مثال ساده برای درک چگونگی عملکرد آن بیاوریم. ما یک برنامه کاربردی ایجاد خواهیم کرد که در آن می توانید رنگ را از یک مستطیل به دیگری درگ و رها کنید.
یک پروژه WPF جدید با نام WPFDragAndDrop ایجاد کنید.
پنج مستطیل را به پنجره طراحی درگ کنید و خواص را مطابق با فایل XAML زیر نشان دهید.
1 2 3 4 5 6 7 8 9 10 11 12 13 14 15 16 17 18 19 20 21 22 23 24 25 26 27 28 29 30 31 32 33 34 35 | <Window x:Class = "WPFDragAndDrop.MainWindow" xmlns = "http://schemas.microsoft.com/winfx/2006/xaml/presentation" xmlns:x = "http://schemas.microsoft.com/winfx/2006/xaml" xmlns:d = "http://schemas.microsoft.com/expression/blend/2008" xmlns:mc = "http://schemas.openxmlformats.org/markup-compatibility/2006" xmlns:local = "clr-namespace:WPFDragAndDrop" mc:Ignorable = "d" Title = "MainWindow" Height = "402.551" Width = "604"> <Grid> <Rectangle Name = "Target" Fill = "AliceBlue" HorizontalAlignment = "Left" Height = "345" Margin = "10,10,0,0" Stroke = "Black" VerticalAlignment = "Top" Width = "387" AllowDrop = "True" Drop = "Target_Drop"/> <Rectangle Fill = "Beige" HorizontalAlignment = "Left" Height = "65" Margin = "402,10,0,0" Stroke = "Black" VerticalAlignment = "Top" Width = "184" MouseLeftButtonDown = "Rect_MLButtonDown"/> <Rectangle Fill = "LightBlue" HorizontalAlignment = "Left" Height = "65" Margin = "402,80,0,0" Stroke = "Black" VerticalAlignment = "Top" Width = "184" MouseLeftButtonDown = "Rect_MLButtonDown"/> <Rectangle Fill = "LightCoral" HorizontalAlignment = "Left" Height = "65" Margin = "402,150,0,0" Stroke = "Black" VerticalAlignment = "Top" Width = "184" MouseLeftButtonDown = "Rect_MLButtonDown"/> <Rectangle Fill = "LightGray" HorizontalAlignment = "Left" Height = "65" Margin = "402,220,0,0" Stroke = "Black" VerticalAlignment = "Top" Width = "184" MouseLeftButtonDown = "Rect_MLButtonDown"/> <Rectangle Fill = "OliveDrab" HorizontalAlignment = "Left" Height = "65" Margin = "402,290,0,-7" Stroke = "Black" VerticalAlignment = "Top" Width = "184" MouseLeftButtonDown = "Rect_MLButtonDown"/> </Grid> </Window> |
مستطیل اول مستطیل هدف است ، بنابراین کاربر می تواند رنگ را از مستطیل دیگر به مستطیل هدف درگ کند.
پیاده سازی رویدادها در #C برای درگ کردن و رها کردن در زیر آمده است.
1 2 3 4 5 6 7 8 9 10 11 12 13 14 15 16 17 18 19 20 21 22 23 24 25 26 27 28 | using System.Windows; using System.Windows.Input; using System.Windows.Media; using System.Windows.Shapes; namespace WPFDragAndDrop { /// <summary> /// Interaction logic for MainWindow.xaml /// </summary> public partial class MainWindow : Window { public MainWindow() { InitializeComponent(); } private void Rect_MLButtonDown(object sender, MouseButtonEventArgs e) { Rectangle rc = sender as Rectangle; DataObject data = new DataObject(rc.Fill); DragDrop.DoDragDrop(rc, data,DragDropEffects.Move); } private void Target_Drop(object sender, DragEventArgs e) { SolidColorBrush scb = (SolidColorBrush)e.Data.GetData(typeof(SolidColorBrush)); Target.Fill = scb; } } } |
هنگامی که برنامه خود را اجرا کردید ، پنجره زیر را تولید می کند.
اگر رنگ را از مستطیل در سمت راست بکشید و آن را روی مستطیل بزرگ به سمت چپ بیاندازید ، فوراً اثر آن را مشاهده خواهید کرد.
بیایید چهارمین را از سمت راست بکشیم.
می بینید که رنگ مستطیل هدف تغییر کرده است. توصیه می کنیم که کد فوق را اجرا کرده و ویژگی های آن را امتحان کنید.
بررسی Interaction یا تعاملی در WPF را در این بخش از آموزش wpf داشتیم. در بخش بعد ۲D Graphics یا گرافیک ۲D را مورد بررسی قرار خواهیم داد. با وب سایت آموزش پی وی لرن همراه باشید.